
Hello there
Here is the best and complete guide on Linksys extender setup with a wifi router. learn all about installation details and methods in the correct order to help you connect devices with the extender after setup.
Once you buy the Linksys extender and open the packaging, you will also receive a quick setup guide for installing and setting up the Linksys extender.
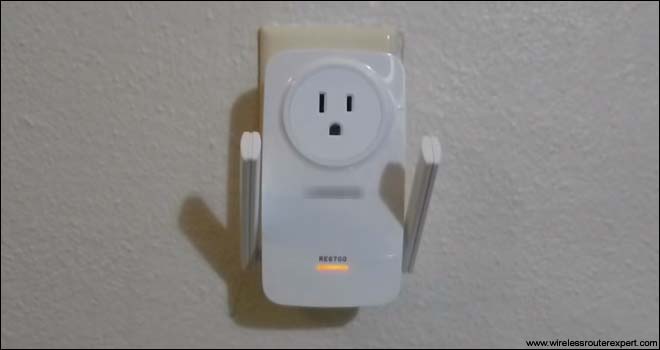
You need to unwrap the Wi-Fi range extender and you need to plug in the extender into the AC wall socket you will see the amber LED light will start blinking after some time and it will continue blinking until you complete the setup.
Require Information for Extender setup
it’s the cause of failed installation, most people ignore the required details and settings and end up doing a faulty installation. you learn to better use the information when you know what is required and how to use it.
we will provide all the information needed within the post so stay tuned. here is what you need.
- Working router with active internet connection
- default IP address or web address to access Linksys extender dashboard
- username and password to login admin dashboard
- an extra ethernet cable (optional)
Now let’s begin the setup, please plug the extender into the power and keep it within the range of the existing router.
- At the bottom of the extender, there is an Ethernet port that you can connect directly to the router for setting it up.
- On the left side of the extender, there is a WPS button and a reset button. Let’s go ahead and proceed further with the setup and installation of Wi-Fi extender
Linksys Range Extender Setup
1- Open up the internet browser on one of your computers and after that go to the right bottom corner and click on the Wi-Fi icon in the taskbar.
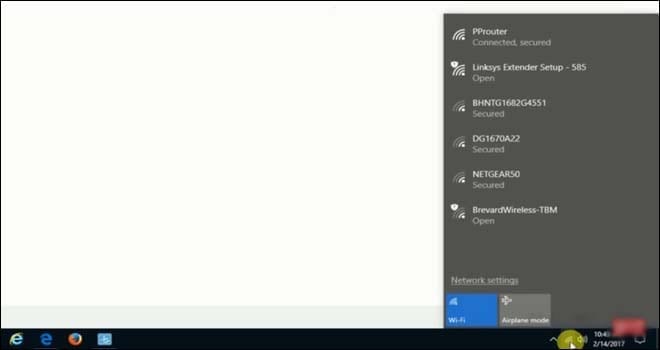
2- You will see the list of wireless networks in your area and you will see a Linksys extender setup on the list.
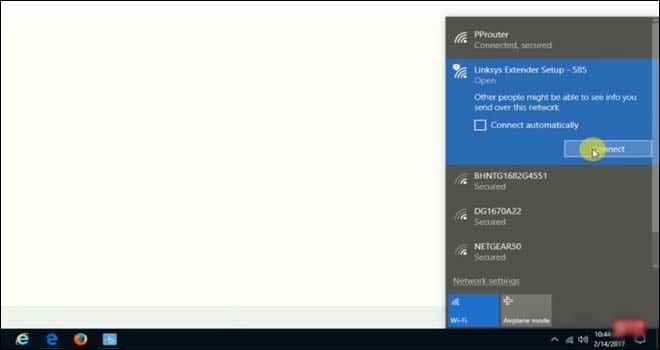
3- You need to go ahead and click on this and click on the “connect” option.
4- There are 2 things that you need to keep in mind the last 3 digits that appear after the Wi-Fi range extender network name are the 3 digits MAC address of your range extender.
5- Once you connect to the network, you won’t be asked for a network password as it is not password protected and it’s an open network.
6- Once you are connected successfully to the extender you will be brought to the window that shows “Welcome to the Linksys range extender setup”.
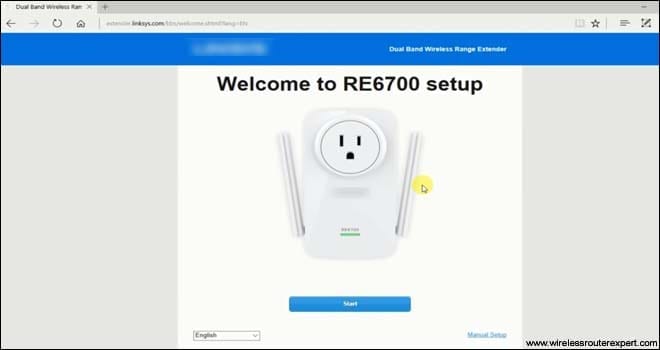
7- If it does not show up automatically, you can click on the URL box at the top corner of the browser screen and type in http://extender.linksys.com and that will take you to the welcome page of the Linksys extender setup page.
8- You will be having an option to change the language, you can click on the down arrow and choose “English”.
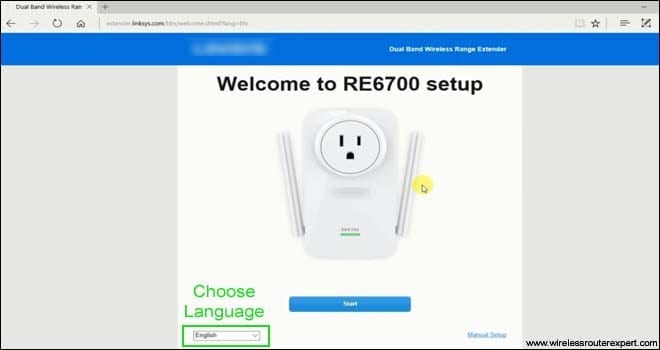
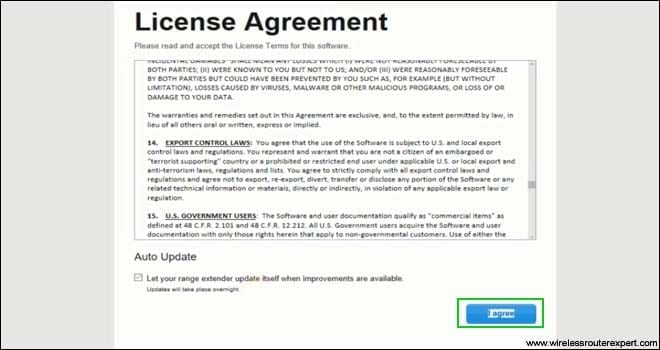
9- Once you click on the Start button after choosing the language, it will bring you to the “License Agreement” page, you need to click on “I agree”.
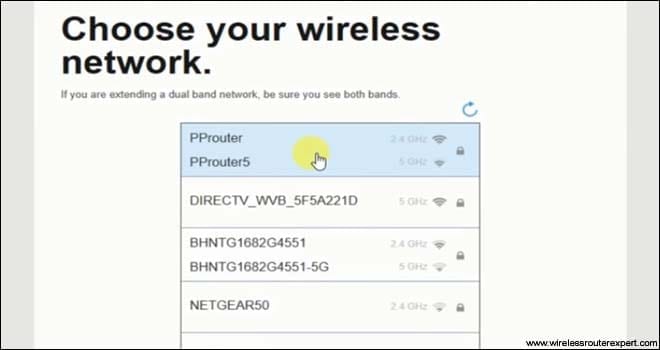
10- Now, it will take you to the Wireless networks page, wherein you need to select the wireless network name of your router.
Configure the Extender settings
- Once you click on your network, it will ask you to enter the “network password”.
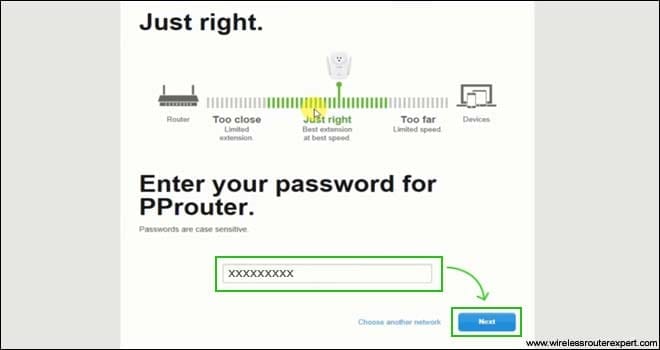
- You can go ahead and type in the password and click on “next”.
- After that, you will see the page that shows the information such as “extended wireless network name” and you can change the default network name here.
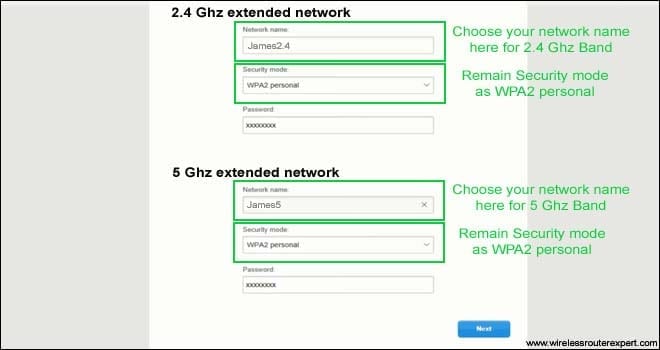
- You can repeat these same steps for the 5 GHz network as well if you have a dual-band extender.
- Leave the security type and password the same and click on “next”
- It will now take you to the page where you can type the “Admin password” and a hint of the password to secure your Wi-Fi range extender from unauthorized access.
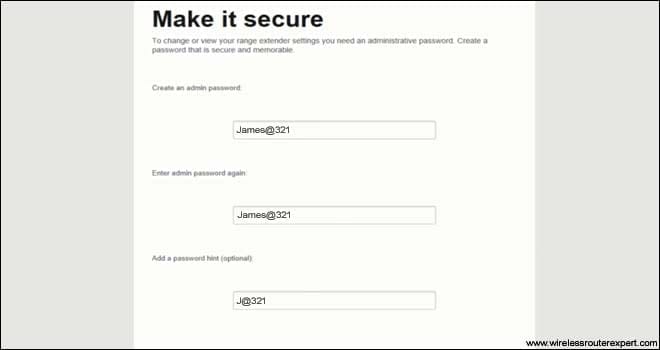
- It is very important that you enter the password and it should not be the same as your Wi-Fi network password.
- If you try to leave it blank, it won’t let you proceed further and once you type the password, click on next.
- Now, a screen will appear that shows “your extender is set up” and you can choose to manage my extender if you want to edit the network settings on your Linksys range extender or you can leave the way it is.
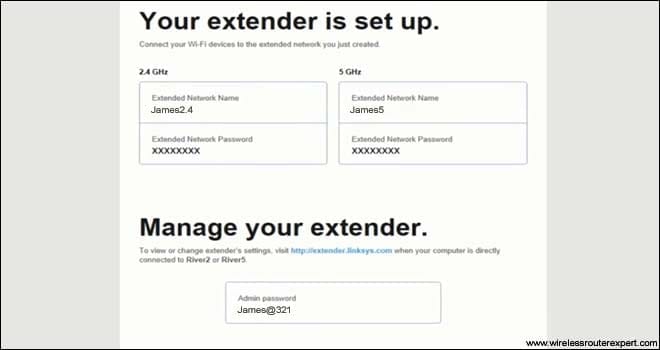
- At this point, you will be now able to establish network connections to the Linksys range extender and you can connect all your wireless devices to the extended network using the new extender password.
- place the extender where you like just be sure its within the router network to extender the existing network signal.
in case you fail to setup the extender please reset the extender settings to default and start over.
there is another Easy method to setup Linksys extender using the WPS.
WPS Method for Linksys extender Setup
makes sure the main wifi router that you are using has a WPS key for this method to work. now here is how you do it.
- Plug the extender to the power outlet within the range of the router and go to the extender
- press the WPS key and hold it for 7-8 seconds until you see WPS light flashing.
- go to the main router and locate the WPS key then press it and hold for 10 seconds
- the wifi router will turn solid and Linksys extender will be connected to the wifi router
- use extender.linksys.com to manage and configure extender settings as explained in the first method.
in any case, you feel in need of additional help do contact linksys customer support for help.
Please let us know if you need any other help with Linksys wifi range extender.
Hope all of this Information will help You Get the Setup Done.