
As smartphones make taking photos increasingly simple, managing a growing photo collection on Mac can seem like an insurmountable task. Yet with the proper tools and techniques in place, photo management becomes manageable quickly – from chaotic piles of photographs to neat libraries! No matter whether you are professional photographer with thousands of images to organize or simply enjoying taking everyday moments photos; this guide serves as your one-stop resource for photo organization on your Mac, iPad and iPhone devices.
Macs offer powerful tools that allow you to organize photos quickly, find, and share memories efficiently. Our guide takes you step-by-step, helping to ensure that your library remains both accessible and organized on all of your devices – plus for those concerned with privacy and security, we explore potential means of safeguarding them!
Step 1: Consolidate Your Photo Library
The first step in organizing your photos is to gather them all in one place. With macOS, you can easily import photos from various sources, including external hard drives, SD cards, and other devices. Here’s how to start:
- Connect your device or insert your SD card into your Mac.
- Open the Photos app, where you’ll be prompted to import your pictures. You can choose to import all photos or select specific ones.
- Once imported, macOS will automatically organize these photos by date, type, and even location, if available.
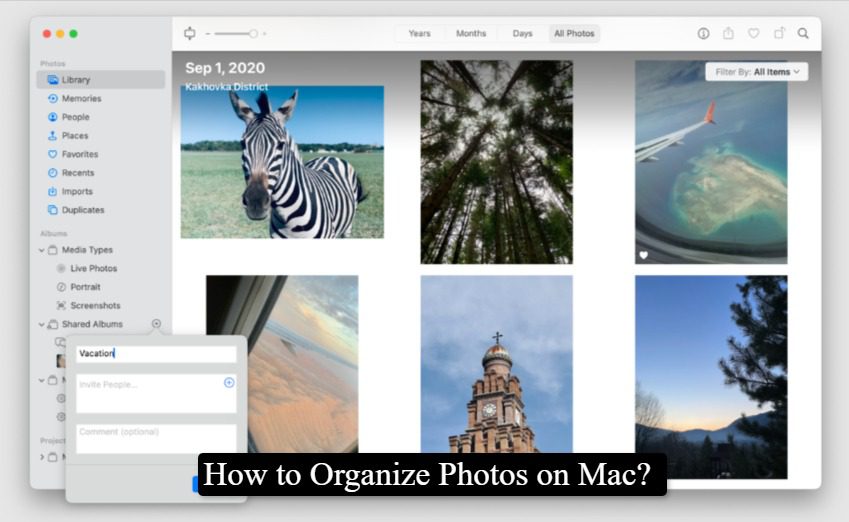
Step 2: Create Albums and Folders
To further refine your photo organization, utilize albums and folders within the Photos app. This allows you to categorize your memories into easily navigable sections.
- To create an album, simply select “File” > “New Album” or “New Folder” to group albums together.
- Drag and drop photos into these albums or use the smart album feature to automatically sort photos based on criteria such as date, location, or tags.
Step 3: Utilize Tags and Keywords
Adding tags and keywords to your photos can significantly enhance your ability to search and retrieve specific images later.
- Select a photo and click on the “Info” button to add descriptions, keywords, and even a location.
- These details make searching for photos as simple as typing a keyword in the search bar.
Step 4: Regularly Backup Your Photo Library
Backing up your photo library is crucial to prevent loss of your valuable memories. macOS makes it easy to back up photos using Time Machine or iCloud.
- With iCloud Photos, your library is automatically updated across all your devices, ensuring you have access to your photos anywhere.
- Time Machine offers a simple way to regularly back up your entire photo library to an external drive.
Step 5: Share Your Memories
Sharing photos with friends and family is a joyous part of photo management. macOS and iOS devices offer various ways to share, from iCloud shared albums to AirDrop.
- Create a shared album in Photos to invite others to view, comment, and add their own photos.
- Use AirDrop for instant sharing of photos between Apple devices without compromising quality.
Advance Tip: Protect Your Photos
macOS offers several solutions to safeguard the privacy of photo libraries on it – password protection and encrypted storage solutions among them.
- Consider storing sensitive photos in encrypted disk images using Disk Utility.
- Use third-party apps designed for photo encryption to add an extra layer of security.
Mac makes managing your photo library an effortless endeavor; following these simple steps should have all your photos organized, backed up, and easily shareable. Dive in today to the world of efficient photo management and discover a whole new joy when revisiting memories while keeping them secure!