installing a range extender should be easy and it is way easier when you know the correct methods to follow. in this post, we help you understand all about dlinkap.local and how to use it for dlink extender setup.
this article will also explain the WPS method for dlink extender setup and how to troubleshoot any issues with the dlink range extender. in case your router is not configured here is the peace of useful and detailed information for dlink router setup
Requirements for dlink Extender Setup
Most of the D Link range extenders have the same setup process and installation procedure that means any series and model of dlink extender can be configured. few things you need upfront before you start the installation process such as-
- internet connectivity with working modem/router
- existing network name and password
- default dlink extender ip address
Your range extender must have come with a configuration page that shows the “default network name” and the “default password”.
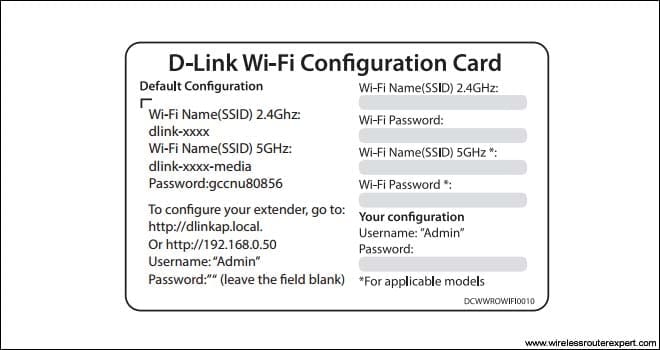
You will require this information when you connect to the D Link range extender network. In case, if you don’t have the configuration card, the required information can be found at the back of the extender.
Configure Dlink Range Extender Settings
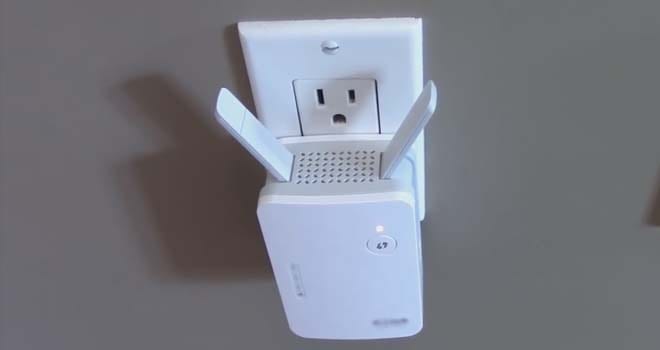
Proceed further and turn the range extender “on”. You will notice that the LED lamp is initially “red” and after some time, it will be flashing amber.
Let’s go ahead and move forward towards a wireless-enabled computer and click on the Wi-Fi icon at the bottom right corner on the taskbar and scan for the available networks in your area.
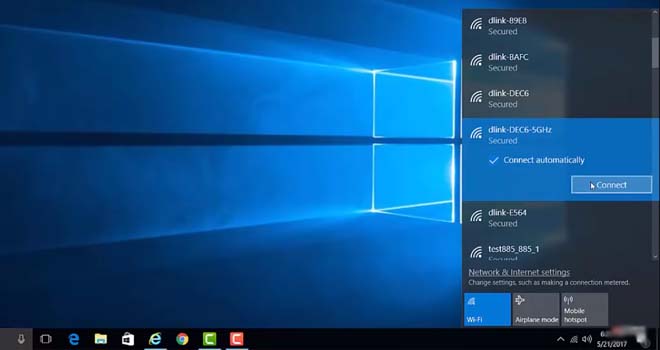
Now, connect to the network of your range extender and since nowadays most of the D Link extenders are dual-band you will be seeing 2 wireless networks from your extender. One network is a 5Gz network and the other is a 2.4 GHz network. You can now go ahead and connect to any of the 2 networks.
Dlinkap.local
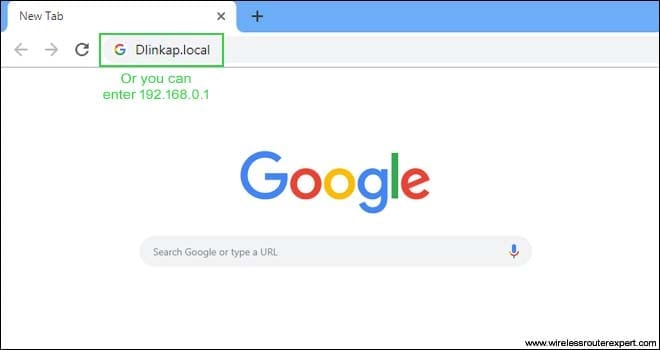
After you connect successfully to the network, you will be directed automatically to the webpage for setting up your extender. If the setup page does not show up automatically, you can go ahead and open up your computer browsers such as Google Chrome, Internet Explorer or Mozilla Firefox.
Now, click on the address bar at the top of the browser window and type in Dlinkap.local and press “enter” or you also type in 192.168.0.1. However, if you still don’t see the setup page, please ensure you are connected to the D Link range extender page.
Note – Dlinkap.local Will only Work if you are connected with Range extender (Wireless Or Wired )
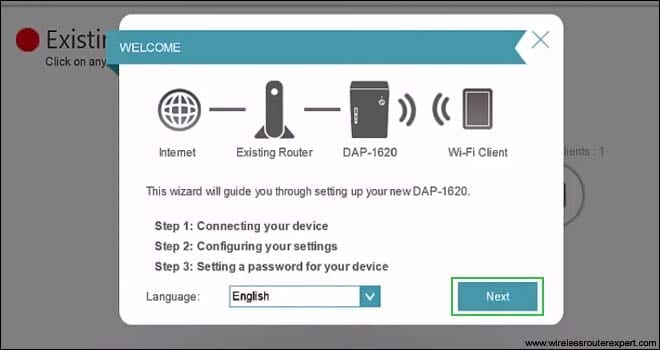
Now, let’s click on “next” on the setup page
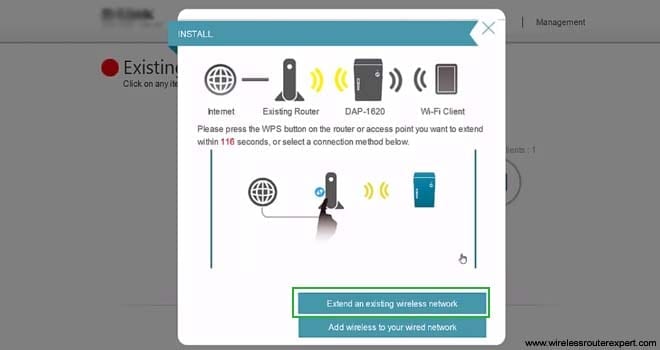
and if you have a router that supports the WPS feature, you can go ahead press and hold the “WPS” button on the router or otherwise you can click on “Extend an existing wireless network” and the extender will now search for the wireless networks.
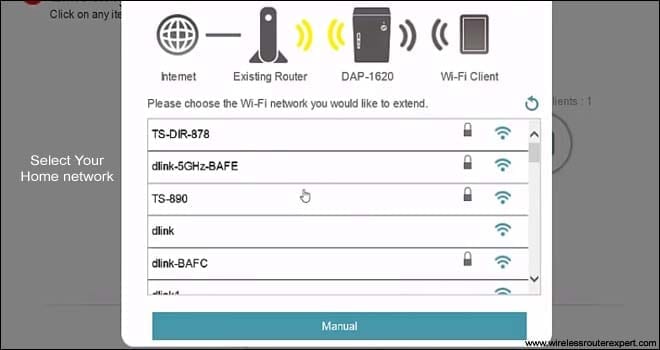
Select the home Wi-Fi network of your router and you will be asked to type in the network password of your home wireless network and once you are completed, click on “next“.
Configure the Extender Settings
Now, you will see a window wherein you can change your extended wireless network name and password. We suggest you change the network name for both 5Ghz and 2.4 GHz and give different names to them in order to avoid any network conflicts in the future.
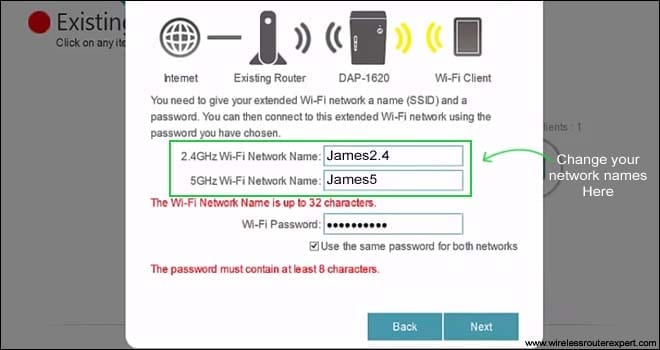
Check the box that says “use the same password for both networks” and the password you enter will be the same for both 2.4Ghz and 5Ghz networks. Now, go ahead and click on “next”.
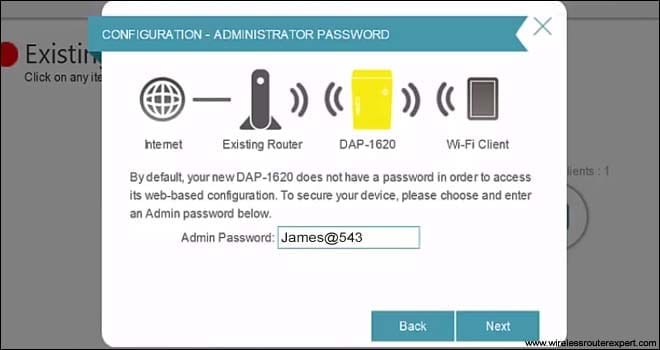
By default, your D Link range extender does not have an administrator password to login to the extender setup network configuration page. If you want, you can create the administrator password to log in to the extender network configuration page and click “next”.
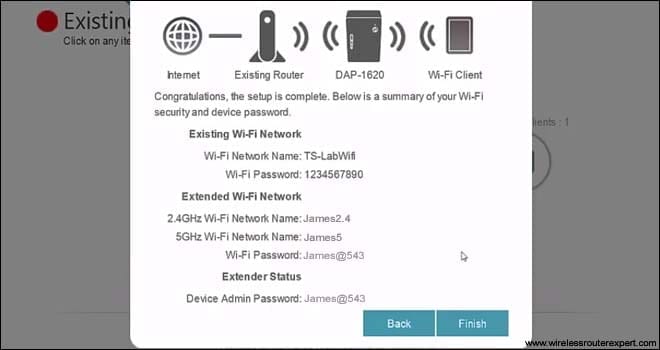
Now, after you are done with the settings, click on “finish”.
You will now see the brief details of all the extender settings you have changed and note down the extender network name and password to use it to connect it to your wireless devices.
The extender will reboot and apply all the changes you have made to the settings. Click “ok” once more on the page that shows “Your settings are being saved”.
Go ahead and close the computer browser and connect to your newly configured D Link extender using the password that you just created.
if all the methods given above don’t work then please reset the extender just like you would reset dlink router back to factory default settings and start over. you can also try another method for installation.
WPS Method For Dlink extender Setup
- plug the extender to power outlet near the router. press the wps key on the extender and hold it for 10 seconds to see wifi light flashing.
- now go to your main router and press the wps key and hold for another 10 seconds
- wait for minutes while the extender makes the security handshake with router and connect with router.
- now open the compter browser to use dlinkap.local to login dlink extender console.
- create extender password and other settings then save the settings.
follow the onscreen instructions to complete the setup and let us know how this guide has helped you.
in case you are in need of help do contact dlink customer support for help.
Hope all of this helps you set up Dlink Range Extender.