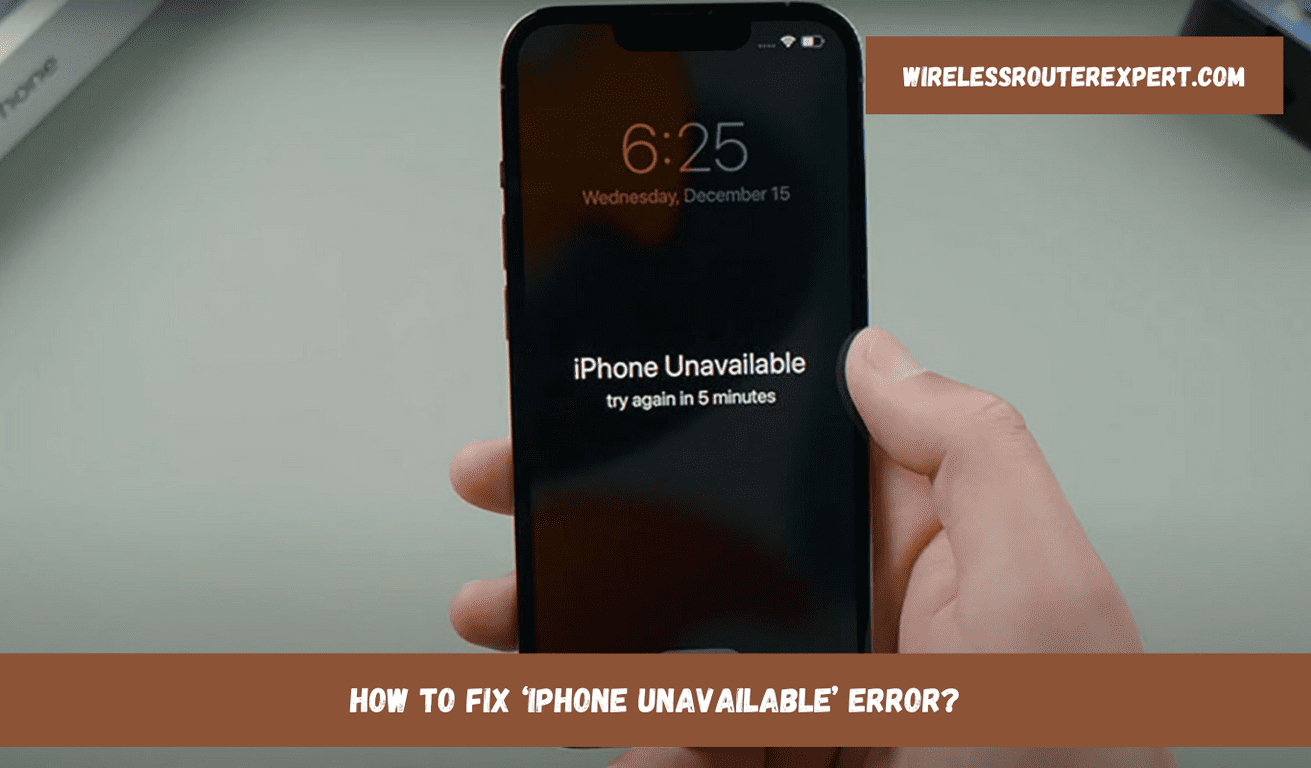
Apple iPhones are widely known for their stringent security measures, one being their device lockout function. This safety mechanism prevents unauthorised access by disabling an iPhone after multiple failed passcode attempts – an essential safeguard against unintended access and data loss; yet can also cause frustration should it disable itself accidentally, locking out you out by mistake! However, whether presented with either “iPhone Unavailable” or “iPhone Disabled” messages upon restart, solving them quickly ensures minimum disruption in daily activities.
Understanding iPhone’s Lockout Mechanism
Lockout features are activated after five unsuccessful attempts at unlocking your iPhone, gradually lengthening with each failed entry attempt and increasing in duration with each incorrect attempt. While designed to protect user privacy and keep unauthorized users at bay from accessing their device, unexpected lockouts may still happen as you rush or sleep on it temporarily, leading to temporary inaccessibility of devices and an increase in lockout duration with subsequent incorrect entries.
The Lockout Timeline
- First five attempts: Initiates a one-minute lockout.
- Sixth attempt: Increases the lockout to five minutes.
- Seventh attempt: Extends the lockout to 15 minutes.
- Eighth attempt and beyond: Locks the device for one hour per attempt.
- After ten attempts: The iPhone either locks down completely or erases its data, depending on your settings.
Restoring Access to Your iPhone
Whether your iPhone runs on iOS 15.2 (or newer) or an older version, regaining access involves different steps. Here’s how to address the situation based on your iOS version:
For iOS 15.2 and Newer: Immediate Solutions
iPhones with iOS 15.2 or newer offer a direct way to erase and reset the device from the “iPhone Unavailable” screen, bypassing the need for additional tools.
- Initiate the Erase Process: From the lockout screen, select “Erase iPhone” or “Forgot Passcode?” and confirm your choice.
- Verify Your Identity: Enter your Apple ID password to authenticate the erase process.
- Restore Your iPhone: After erasure, set up your iPhone as new or restore it from a recent backup.
For iOS 14 or Older: A Stepwise Recovery
If your device is on iOS 14 or older, and you haven’t enabled the “Erase Data” option, you’ll need to connect your iPhone to a computer to restore it.
- Connect to iTunes or Finder: Depending on your computer, use iTunes or Finder to manage your iPhone in recovery mode.
- Enter Recovery Mode: Follow specific button sequences based on your iPhone model to enter recovery mode.
- Restore Your Device: Choose the “Restore” option to erase all data and set up your iPhone anew.
Leveraging iCloud for Remote Erasure
For those with “Find My iPhone” enabled, remotely erasing your device through iCloud.com is an efficient solution to bypass the lockout.
- Log into iCloud: Visit icloud.com/find and sign in with your Apple ID.
- Select Your Device: Choose your iPhone from the “All Devices” dropdown and opt for “Erase iPhone.”
- Re-setup Your iPhone: Follow the on-screen instructions to reset your iPhone and restore it from a backup if available.
Preventing Future Lockouts
Prevention is better than cure, and this adage holds true for avoiding future iPhone lockouts. Here are some tips to keep your device accessible:
- Opt for Memorable Passcodes: Choose a passcode that’s easy to remember but hard for others to guess.
- Utilize Biometric Authentication: Take advantage of Touch ID or Face ID for convenient access while keeping your device secure.
- Disable Automatic Screen Activation: Turn off “Tap to Wake” and “Raise to Wake” features to reduce accidental screen activation and subsequent unintended passcode entries.
While iPhone Unavailable/iPhone Disabled messages may interrupt your digital routine, Apple offers multiple pathways to quickly regain access. By following your iOS version’s specific steps for remote erasure or using iCloud for remote deletion, your iPhone should be back online within minutes and back enjoying its features in no time at all. Taking preventive steps against future lockouts may further ensure constant access.